Introduction:
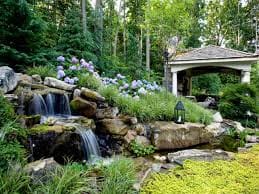
As the winter chill gives way to the warmth of spring, homeowners eagerly anticipate the revival of their gardens and lawns. One crucial step in preparing your outdoor space for the blooming season is turning on your lawn sprinkler system. Ensuring your sprinklers are in top-notch condition will guarantee a lush and vibrant garden throughout the spring and summer months. In this comprehensive guide, we’ll walk you through the steps to properly activate your lawn sprinkler system, ensuring your lawn receives the hydration it needs to thrive.
Step 1: Inspect Your Sprinkler System
Before you start the sprinkler system, it’s essential to conduct a thorough inspection to identify any damages or issues that might have occurred during the winter months. Check for broken sprinkler heads, leaky pipes, or damaged valves. Replace or repair any faulty components to prevent water wastage and uneven watering of your lawn.
Step 2: Clear Debris and Obstructions
During winter, debris such as leaves, twigs, and dirt can accumulate around your sprinkler heads, hindering their functionality. Carefully remove any debris to ensure unobstructed water flow. Additionally, check for obstructions like overgrown grass or plants that might interfere with the sprinkler’s spray pattern. Trim back any vegetation around the sprinklers to guarantee even coverage.
Step 3: Gradually Increase Water Pressure
When you turn on your sprinkler system after months of inactivity, it’s crucial to avoid sudden surges in water pressure. Rapid pressure changes can damage the pipes and sprinkler heads. Instead, slowly increase the water pressure and observe the system’s performance. If you notice any irregularities or leaks, promptly address them to prevent further damage.
Step 4: Check the Controller Settings
Most sprinkler systems come with controllers that allow you to set specific watering schedules. Review and adjust the controller settings according to your lawn’s requirements and local watering restrictions. Consider programming the sprinklers to operate during the early morning or late evening when the temperature is cooler, reducing water loss due to evaporation.
Step 5: Perform a System Test
Conduct a system test to ensure all sprinkler heads are functioning correctly. Activate each zone individually and observe the spray pattern and coverage. Look out for areas that receive too much or too little water, as this could indicate misaligned or damaged sprinkler heads. Adjust the heads as needed to achieve uniform watering across your lawn.
Step 6: Check for Leaks
While the system is running, inspect all components, including pipes, valves, and connections, for any signs of leaks. Even minor leaks can lead to significant water wastage over time. If you discover a leak, turn off the system and repair the affected area immediately to conserve water and prevent potential water damage to your property.
Step 7: Consider Upgrading Your System
If your sprinkler system is outdated or inefficient, consider upgrading to a modern, water-saving irrigation system. Smart sprinkler controllers, for example, use weather data to optimize watering schedules, ensuring your lawn receives adequate moisture without unnecessary wastage. Upgrading your system can also lead to long-term cost savings on water bills.
Conclusion:
Turning on your lawn sprinkler system for spring is a vital step in maintaining a healthy and vibrant garden. By following these steps, you can ensure your sprinklers function efficiently, providing your lawn with the right amount of water it needs to flourish. Regular maintenance and timely repairs will not only conserve water but also contribute to the overall beauty of your outdoor space. So, get ready, set, and let your lawn sprinkle its way to a lush and thriving spring season!