Introduction
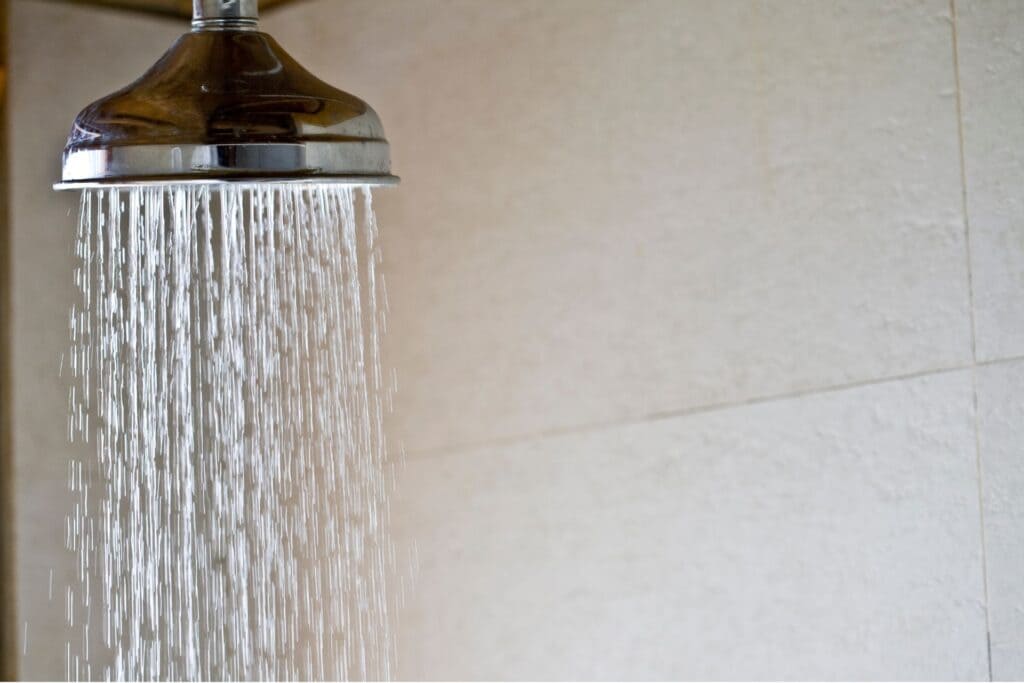
A Moen shower pressure balanced valve is a vital component of any shower system, ensuring a consistent water temperature and pressure during your shower. However, like any mechanical device, these valves can develop issues over time, leading to reduced performance or even complete failure. Troubleshooting a faulty Moen shower pressure balanced valve can save you time and money, as well as ensure a comfortable and reliable showering experience. In this comprehensive guide, we will explore common problems associated with Moen shower valves and provide detailed troubleshooting tips to help you diagnose and resolve these issues effectively.
Understanding the Moen Shower Pressure Balanced Valve
Before diving into troubleshooting tips, it’s essential to have a basic understanding of how a Moen shower pressure balanced valve works. This valve is designed to balance the hot and cold water supplies to maintain a consistent temperature, even when there are fluctuations in either supply. It comprises various components, including a cartridge, handle, and trim, all of which play crucial roles in regulating water flow and temperature.
Common Problems and Causes
No Water Flow:
- Possible Causes:
- Clogged showerhead or valve inlet filters.
- Blocked or faulty cartridge.
- Issues with water supply lines.
- Troubleshooting Tips:
- Check and clean the showerhead and valve inlet filters to ensure unrestricted water flow.
- Inspect the cartridge for debris or mineral buildup; replace if necessary.
- Verify that the water supply lines are properly connected and not blocked.
Uneven Temperature or Pressure:
- Possible Causes:
- Imbalanced hot and cold water supply.
- Worn-out or damaged cartridge.
- Sediment buildup in the valve.
- Troubleshooting Tips:
- Adjust the temperature limit stop on the valve to balance the hot and cold water supply.
- Replace the cartridge if it’s worn or damaged.
- Flush the valve to remove sediment buildup, ensuring smooth water flow.
Leaks from the Valve:
- Possible Causes:
- Loose or damaged connections.
- Faulty O-rings or seals.
- Damaged cartridge.
- Troubleshooting Tips:
- Tighten loose connections using a wrench, ensuring they are snug but not over-tightened.
- Inspect O-rings and seals for signs of wear or damage; replace them if needed.
- If the leak persists, replace the cartridge to eliminate internal issues causing the leak.
Difficulty in Adjusting Temperature:
- Possible Causes:
- Stiff or worn-out temperature control handle.
- Sediment accumulation inside the valve.
- Improperly adjusted temperature limit stop.
- Troubleshooting Tips:
- Lubricate the temperature control handle or replace it if it’s stiff or difficult to turn.
- Flush the valve to remove sediment buildup, allowing for smoother temperature adjustments.
- Adjust the temperature limit stop following the manufacturer’s guidelines for your specific model.
Water Temperature Fluctuations:
- Possible Causes:
- Fluctuations in the household water supply.
- Sediment buildup within the valve.
- Worn-out cartridge or other internal components.
- Troubleshooting Tips:
- Verify if other appliances using water are causing fluctuations; if so, consult a plumber to balance the overall water pressure.
- Flush the valve thoroughly to remove sediment, ensuring stable water flow and temperature.
- If problems persist, consider replacing the cartridge or other internal components.
Scalding or Cold Water Surges:
- Possible Causes:
- Incorrect temperature limit stop setting.
- Worn-out or damaged cartridge.
- Pressure imbalances in the hot and cold water supply.
- Troubleshooting Tips:
- Adjust the temperature limit stop to prevent scalding or cold water surges; this is especially important in households with young children or elderly individuals.
- Replace the cartridge if it’s compromised, ensuring accurate temperature control.
- Consult a plumber to assess and balance the hot and cold water supply pressure if necessary.
Continuous Dripping After Shower Use:
- Possible Causes:
- Worn-out seals or O-rings.
- Faulty cartridge.
- Mineral deposits causing internal damage.
- Troubleshooting Tips:
- Replace worn-out or damaged seals and O-rings to prevent continuous dripping.
- If the issue persists, replace the cartridge to address internal damage caused by mineral deposits or wear.
Troubleshooting Steps
Gather Necessary Tools:
- Before starting the troubleshooting process, gather essential tools such as an adjustable wrench, screwdrivers, pliers, and lubricant. Having these tools handy will make the process more efficient.
Turn Off Water Supply:
- Locate the main water supply valve for your shower and turn it off to prevent water flow during troubleshooting. It’s crucial to ensure your safety and avoid any mess caused by water leakage.
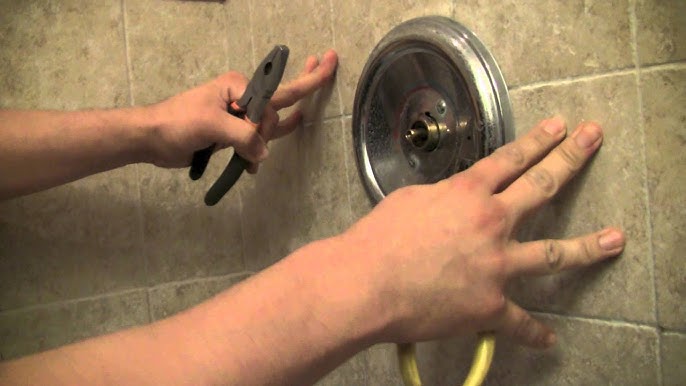
Disassemble the Valve:
- Remove the handle and trim carefully, exposing the valve components. Refer to the manufacturer’s manual for your specific Moen valve model to understand the disassembly process. Use appropriate tools and be gentle to avoid damaging any parts.
Inspect and Clean Components:
- Examine the cartridge, seals, O-rings, and other components for signs of wear, damage, or mineral buildup. Clean these parts thoroughly using a soft brush and mild cleaning solution to remove any debris or sediment.
Replace Faulty Parts:
- If you identify damaged or worn-out components, replace them with genuine Moen replacement parts. Follow the manufacturer’s guidelines to ensure proper installation and prevent future issues.
Lubricate Moving Parts:
- Apply a lubricant, such as silicone-based grease, to moving parts like the cartridge and temperature control handle. Lubrication reduces friction, allowing for smoother operation and preventing premature wear.
Reassemble the Valve:
- Carefully reassemble the valve components, ensuring everything is properly aligned and securely tightened. Avoid over-tightening, as it can damage the parts or cause leaks.
Turn On Water Supply and Test:
- Turn on the main water supply valve and test the shower to check if the issues have been resolved. Monitor water flow, temperature consistency, and any signs of leaks.
Adjust Temperature Limit Stop (If Necessary):
- If you experience temperature issues after reassembly, adjust the temperature limit stop according to the manufacturer’s instructions. This ensures the water temperature remains within a comfortable and safe range.
Monitor for a Few Days:
- After troubleshooting and resolving the issues, monitor your shower for a few days to ensure the problem does not recur. This helps confirm the effectiveness of your troubleshooting efforts.
Conclusion
A faulty Moen shower pressure balanced valve can disrupt your daily routine and compromise your showering experience. By understanding the common problems, their causes, and following the systematic troubleshooting steps outlined in this guide, you can effectively diagnose and resolve issues with your Moen shower valve. Remember to consult the manufacturer’s manual for your specific model and, if necessary, seek professional plumbing assistance for complex problems. With the right knowledge and tools, you can maintain your shower valve in optimal condition, ensuring consistent water flow and temperature for a relaxing and enjoyable shower every time.